FAQ: “One of our manufacturing departments has a UltraScan VIS that they use to monitor a process at-line. After we saw that their white tile appeared a bit dingy and scuffed, we recommended they get a new one. The new white tile came in, but it comes with a software CD.  My questions?

If the purpose of the white tile is to help set the top of the scale in both transmittance and reflectance measurements, why is the software necessary?”

The white tile is a calibrated instrument standard used to set up the diffuse d/8 sphere sensor for reflectance measurements, in both RSIN (reflectance specular included) and RSEX (reflectance specular excluded) modes. When we say it is an “instrument standard”, this means the instrument is forced to match the calibrated, traceable values assigned to this white tile during the standardization procedure.

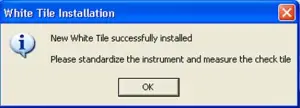
These white tile calibration values are stored on an EPROM memory chip on the sensor. When you implement a white tile replacement, a CD is sent out with the New White Tile to update the sensor firmware with the new white tile values. White porcelain-on-steel tiles are fired in a kiln and the process of manufacture leads to some small variation among the tiles. You may not be able to see them, but these small differences are negated by assignment of calibrated values to each white tile relative to the same traceable assignment process. The white tile assigned to the sensor carries the same serial number as the sensor and cannot be interchanged with other white tiles.

If you are going to use the new calibrated white tile on this sensor, you have to run the CD program to update the white tile values in the sensor memory.

For transmission measurements, the white tile just fills in the reflectance sphere port and the calibrated values are not assigned during transmission standardization.

FAQ: “The value of the green tile seems associated with that of the white tile. When we standardized the sensor using the old white tile, its green tile passes. When we use the new one (w/o software) the green tile fails (low XYZ values).”

The Green Tile is a diagnostic standard for testing the instrument performance, not an instrument standard for setting up the sensor.

At the factory, when the instrument was last calibrated, a series of colored tiles are read to qualify the unit as reading color within norms for that sensor model. If the instrument reads within these model norms and passes other performance tests, we then read the Green Tile and record the X, Y, Z D65/10 values Read-At-Factory on the back and date it.

This allows the user to read the Green Tile on the instrument after standardization and verify that it is reading the same (within tight tolerances) over time. The Green Tile test is used to allow the user to self-certify over the long term (months, years) that their instrument is reading the reflectance of this this Green Tile within factory tolerances.

The Old and New White Tiles are not identical in color, and are not interchangeable without updating the sensor with the New White Tile values on the CD.

INFO  Get More Information

Suggested Protocols

  • Standardize sensor using Old White Tile.
  • Run the Green Tile Diagnostic Test.
  • Record X, Y, Z D65/10 values for the Green Tile, along with the differences from the assigned Values Read-At-Factory, showing the sensor status as PASS with read values close to the assigned values on the back of the Green Tile.
  • Run the CD and update the sensor with your new White Tile values.
  • Standardize sensor using New White Tile.
  • Run the Green Tile Diagnostic Test.
  • If your sensor passed before, it should PASS now. On very rare occasions, if your instrument is right on the edge of the Green Tile tolerance, it can FAIL with the new white tile. Contact HunterLab for resolution options

FAQ: “The reason we didn’t use the software that came with the white tile was that this instrument is running the old Universe software, not EasyMatchQC, and we feared that there might be a compatibility problem that would wreck the operation of the instrument.  As production could not suffer that instrument being down, we did the above-cited tests without installing the software.  As the green tile passed with the old white tile standard, we decided to leave things alone right now.

So is the white tile software compatible with the old Universe software, or would these people have to upgrade to EasyMatchQC?”

There should be no compatibility issues with software. The CD program used to update the white tile values in sensor memory is independent of the software platform. When standardizing, Universal or EasyMatch QC calls to the sensor for its White Tile calibration values, and uses whatever values are recorded there.

The CD program is run and until a message comes up indicating that the values have been updated successfully, the Old White Tile values are still there.

When you have updated the sensor firmware with the New White Tile values, have checked the Green Tile and everything is fine, we suggest removing the Old White Tile from the instrument area. If you really want to keep the old white tile around, strip off the label so that the White Tile used for standardization is the one with the label and values on the back.

FAQ: “Looking at the details the white tile installation program has a “download” feature. Does this mean that the PC must be connected to the internet to actually download the white tile values? This one is not connected to anything.  Moreover, even with our other colorimeters, all our instrument PCs are on a separate domain and our IT department allows them to have no internet access at all.  So if the white tile replacement program requires internet access that’s a no-go. Please advise.”

The first part of the CD program is to install the White Tile Replacement program on the PC (when the desktop icon shows up, this is done).

The second part is to have the instrument connected to the PC (no network connection needed; just the PC) and double click on the desktop icon to start the White Tile Replacement program which will install the calibration values for your new white tile in the sensor firmware.

When you get this message, the calibrated values for the new white tile are installed on the sensor and you’re done.

successfully-installed.webp